
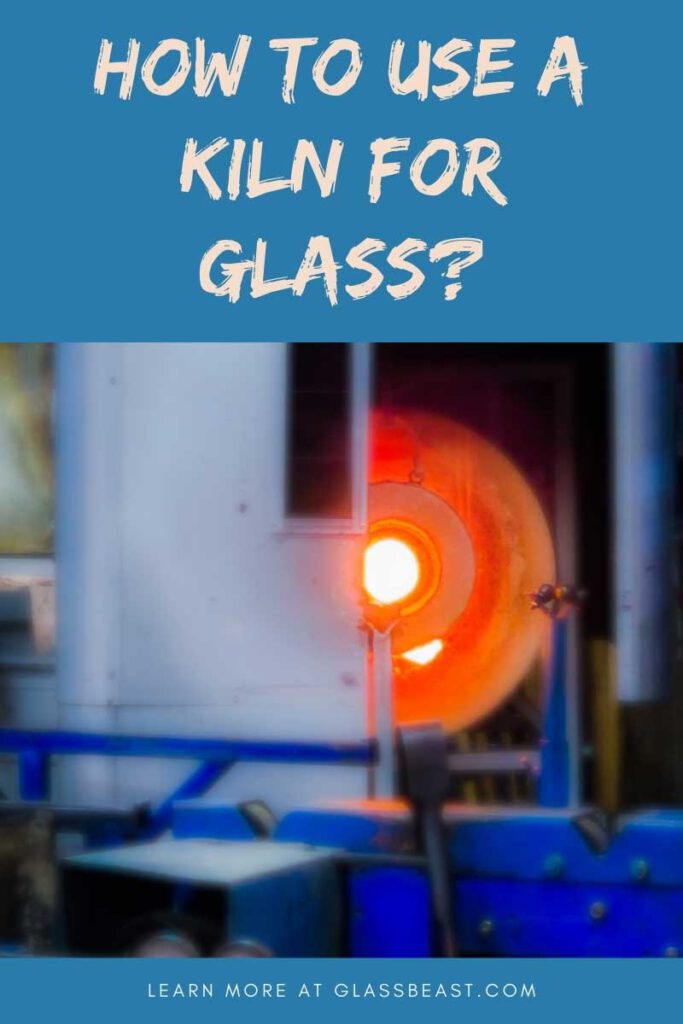
If you’re a manufacturer you might have used the term “Kiln” many times. Using this term for delicate material like “Glass” is beyond fun. Why do you need to use a kiln for glass? The simple answer is we need to use a kiln when we want to fuse, slump, polish, mold, and melt glass.
The most common usage of kilns is for fusing and slumping. Glass Kilns are of many types such as microwave glass kilns, electric kilns, stainless steel kilns, ceramic kilns, craft kilns, traditional kilns, and professional glass fusing kilns. Almost in every kiln, you can perform the fusing task of layers of glass under high temperatures.
How to use a kiln for glass? It depends directly on the type of kiln you’re using. In a craft kiln, you can simply fuse glass by setting the timer and temperature. Place the kiln paper, cut the glass sheets, and set layers. Now put it inside the kiln with finger distance. Set the temperature and timer. Glass will fuse. It’s that simple!
The process of fusing glass is not the same in every kiln. You need to follow the guidelines of every kiln type and the firing schedule of different glass materials accordingly. Below is a simple procedure for using it for beginners.
Must Read: Best glass kiln for beginners guide.
5 Steps Before Getting Started With Glass Kiln
Fusing glass in a kiln is an art that involves a bit of danger. It’s not as easier as it seemed to be. Like an art student, you need to be careful about choosing and using the right tool at the right time. It’s not just putting glass pieces in the kiln and starting fusing. Before this, there are many steps that you need to follow.
Get ready!
Step-1: Choosing Glass
Choosing the right family of glass is essential to start fusing. For this, the right way is to consult the glass manufacturers. Below is the list of common glass types that you may choose:
Sheet Glass
It is a thin form of glass that looks like a sheet. It is easy to cut. It is available in a range of sizes and colors.
Frit Glass
When sheet glass is broken into splinters, it is known as frit. This is done when you need different colors for fusing.
Cane Glass
It is more like a stretchy piece of glass. It is shaped with a thin rod during firing. It is stretchable to whatever length you want it to be.
Step-2: Glass Compatibility
Glass has the ability to expand when heating and contract when cooling. The rate at which glass expands and contracts vary with the type of glass used. This rate is termed as the Coefficient of expansion C-E-O. If you try to fuse two-piece of glass with different rates of expansion the result will be breakage.
Honestly choosing the right family of glass for fusing is a buzz. It is better to choose tested compatible pieces of glass for fusing. Many glass manufacturers keep on testing the compatibility of glass to ensure better results infusing. If you are doubtful about a compatible pair of glasses you can ask the manufacturer directly.
Step-3: Budgeting & Buying Glass
It’s important to buy glass according to your budget. If you want to save a few pence, cut it yourself. Cutting it does not involve rocket science. Using the right tool you can perform this job yourself easily. I would recommend you buy a glass sheet of 12” x 12” of 3mm thickness.
This pack offusible glass square sheets is best for beginners. It is pre-cut and small to handle for crafts.
Step-4: Cutting Tools & Supplies
Now you have chosen glass to work with, you need essential tools to help with glass firing, cutting, handling, and crafting.
Glass Cutters
When you need to break glass to shape it in different designs, usehttps://www.amazon.com/s?k=glass+cutter&ref=nb_sb_noss_2[glass cutters](https://amzn.to/3imAsw4). These are available in different materials, shapes, and sizes.
Running Pliers
These pliersare very useful to cut glass. You can use it along the score line during stretching. For small cuts, it is a useful tool.
Mosaic Cutters Or Nippers
This type of cutter has cutting tips. When you melt and shape glass, it helps to shape liquid glass. This heavy-duty mosaic cutter kit is best for cutting and shaping glass.
Non- Glass Supplies
For using glass in the kiln you also need some supplies to be used in a kiln or out of the kiln for crafting. For a kiln, you may need kiln wash and kiln paper. Below is the list of items to help you in using glass in a kiln:
Kiln Wash
Kiln Paper
Metallic Sharpies
Marker
Rulers
Dustpans
Gloves
Eye-Protector
Elmer’s Glue
Step-5: Preparing Workplace
To start glass work, it is important to prepare your workspace. If you don't have a studio at home you can separate an area for keeping the glass oven. Keep the safety factor in your mind. One thing more good ventilation is necessary as the kiln may exceed the room temperature. Light is another crucial factor to see glass when it is cut. So, arrange a well-lit space. This place should be away from the reach of children and pets. Remember glass is sharp it can hurt if not handled carefully.
Now you’re done up with the steps before using glass in a kiln.
Let’s proceed!
How To Use A Kiln To Fuse Glass -15 Steps
Now you are fully aware of glass types, tools, and preparing workspace for the kiln. It’s time to start fusing. Here we’re going to describe the fusing in a simple kiln.
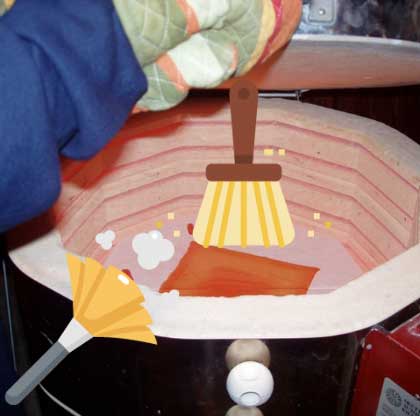
Step-1: Cleaning The Kiln
The first step is to clean out the kiln from the inside. In this way, you can clear out the debris of previous fusing work. For this, you can use a small vacuum and dust brush. If you want to fuse glass pieces in the mold, you need to follow additional steps.
Step-2: Set The Kiln Paper
Take kiln paper and trace out the base with a pencil. Now cut the base according to tracing marks. Adjust the filter paper to fit the base.
Step-3: Cut Glass
Now mark the glass sheet you want to cut. Using glass cutters, cut it carefully. For safety, don't forget to wear gloves. Set layers or pieces you want to fuse.
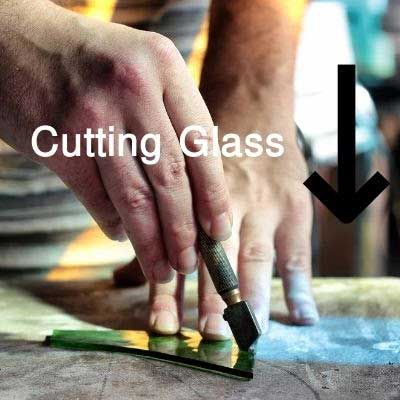
Note: Don't cut more than 2-3 layers.
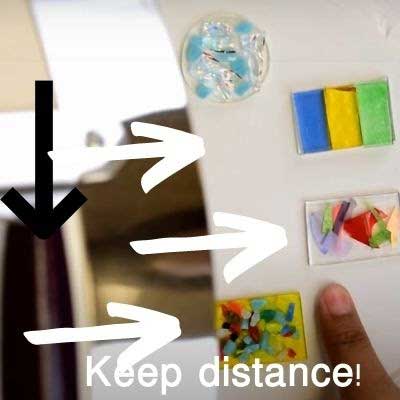
Step-4: Place Glass Pieces In Kiln
Now it’s time to place each piece in the kiln carefully. Keep the distance between each piece. It may expand during firing. So, maintain proper distance when placing in the kiln.
Step-5: Set Time
Now set the timer. It depends on your kiln type and glass material. For starters 3 to 5 minutes is enough. But for a preheated oven, you may reduce this time to 3 minutes.

Step- 6: Keep checking The Firing Process
You can monitor the firing process by opening the lid of the kiln during firing. But don't exceed the time of lid opening. I may start cooling the firing process.

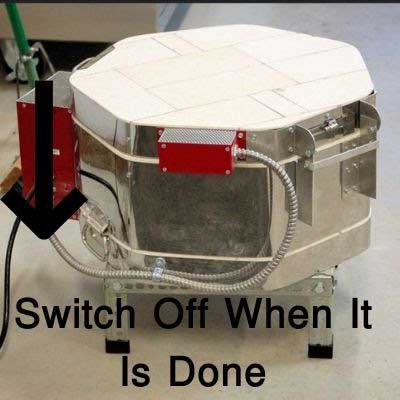
Step-7: Turn Off the dial
When it is done turn the dial to zero. If you notice, it needs more time. Turn on the time for a few seconds only. Don't increase the temperature.
Step-8 Cool Down The Kitchen
Now it’s done with firing. Let it cool down for half an hour with the lid closed. After this, open the lid and let it cool for about 30 minutes.
If you want to see the whole process, get help from this video.
https://www.youtube.com/watch?v=jaqV6nGAXnU
Safety Tips To Use Kiln For Glass
Handling glass is not as easy as you may think. It's sharp material that may cause serious hurt and bleeding. So, follow the tips below to carry out the fusing process safely:
Don't forget to wear gloves
Use eye protectors
Keep an eye on kids if you are using it at home
Don't overheat the kiln
Increase temperature gradually
Don't store the kiln before cleaning
If you’re looking for the best glass kiln for beginners , consider this microwave glass kiln. It’s simple and easy to store when not in use.
Frequently Asked Questions
How do you make glass in the kiln?
First, choose two or more layers of compatible glass. Place it in the oven stacked together. Set the temperature and melt it. After melting, the glass will fuse together.
Can a pottery kiln be used for glass?
Yes, it can be used for glass. The reason is that it has a low temperature. You can go without using a lid on the glass. So, it is fine to use this kiln for molding glass.
How long does it take to fuse glass in a kiln?
This time varies with the type of kiln. On average, it may take 20 minutes or more to fuse glass. However, the temperature limit should not exceed 1450 C.
Final Lines
Using a kiln for glass fusing is not a buzz now. After reading this post you can do it yourself. All you need to do is to follow the steps described above. If you want to fuse glass pieces in the kiln inside the mold, you need to follow additional steps.
Share your experience of fusing glass and go-to materials. It would be fun to post your efforts in the comment box!